Monday, May 30, 2011

Silly Graffiti Totem

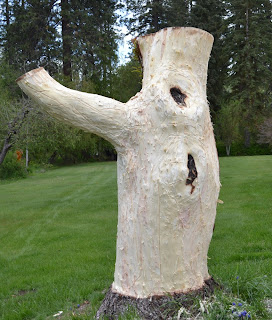
I started out with plans of turning a stump into a Kokopelli, but the stump had other plans and I had to adapt and change the design.  Ater three long days the result is a silly graffiti totem.
The stump

The other side of stump
Sketches of the design

Debarked and block sketch layed out, ready to start sawing

The inside has a huge rotten spot, so original design is not going to work

Me carving on sculpture in process.  I used the chainsaw to layout the design and chisels to do the shallow relief work

Finished Silly Graffiti Totem  The false teeth allow the mouth to be a planter.

Finished Silly Graffiti Totem a happy sun overlooks the patio

Finished Silly Graffiti Totem, a kokopelli hides on the backside

Finished Silly Graffiti Totem, cheesy grin

Finished Silly Graffiti Totem, complete with Siscal tribute (their cat)

Friday, May 27, 2011

New Earring Designs

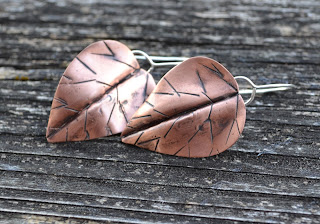
Two new pieces I finished last night.
Brass, Sterling Silver

Copper, Brass, Sterling Silver
Jim

Wednesday, May 25, 2011

Late Mother's Day

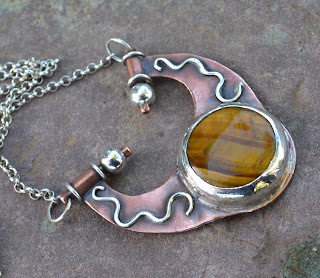
I finished these simple earrings as a late Mother's Day gift for my Mom.  The design goes with the jasper necklace I made for her birthday earlier this year.
Copper, Sterling Silver, Red Creek Jasper
Jim

Tuesday, May 24, 2011

New Earring Designs

I have created five new earrings.  I tried the 3 dots with a tail using rivets instead of soldering on the three dots for a new variation on my design.

J110515, Copper, Sterling Silver

J110510, Copper, Fine Silver, Sterling Silver

J110512, Copper, Sterling Siver, Fine Silver, Garnet

J110513, Copper, Brass, Sterling Silver

J110514, Sterling Silver, Copper
Jim

Monday, May 9, 2011

Flower Pendant

Robin finished a delightful flower pendant of sterling silver with a amathyst stone. 

Robin also designed and hand made some sterling silver earrings with bezel set lapis and a copper swirled line soldered on the side.  The contrast and play of complimentary colors make the blue really stand out.

She is currently working on a red jasper piece and a larimar piece.

I was able to finish several earrings and have a couple very close to completion.  I am excited about a organic shaped piece of formed copper with forged brass intertwined.

Jim

Friday, May 6, 2011

Finding Time

I have been trying hard to find more time to work on my art and business without sacrificing too much family time.  My engineering has become a little more sain this week, with the past couple being close to 50 hours plus all the activities of track, volleyball, softball and daily errands.  I have been getting up early this week still and using the extra time before work to work on my art, write in this blog, and catch up on archieving past works.  I read a really good blog found through thread on etsy on small scale goals that was appropriate for where I am at right now.  If you do what you can with time alotted and set small goals and brake larger task into pieces then progress can be made and at the end of the week you have a feeling of accomplishment instead of sorrow from another week slipping by and not getting anything done.  Here is the link to the blog.

http://zenhabits.net/small-scale/

Jim

Wednesday, May 4, 2011

How To Make Head Pin Or Rivet Head Making Tool

This is how I made a simple tool to make flat head pins.  The same concept could be used to make a rivet head making tool.
Use a harded steel washer and drill a hole just bigger in diameter than the wire you plan on using for the head pin or rivet.  Use some cutting fluid or WD40 while drilling the steel to keep the drill cool and lubricated and be patient, as the steel is much harder than precious or base metals used in jewelry.  You can find washers at your local hardware store or online through places like McMaster-Carr. 

Drill a larger hole (1/8") for 22ga wire in a short piece of wood near one end.

I used 5 minute epoxy to hold the washer to the piece of wood.

Mix epoxy 1:1 according to instructions and put over the hole where the washer will go.

Place the washer over the hole lining up the small hole drilled through the washer and the clearance hole in the wood.

Clamp the washer in place and allow full cure time to dry, typically 24 hours.  I put a piece of scrap paper between the washer and clamp to keep the epoxy off the clamp.

Remove the clamp and paper.  Sand the top of the rivet to remove excess epoxy and create flat surface.  Using the same drill sizes used in the washer and clearance holes, chase out the epoxy by redrilling.

Clamp the block to a table with the rivet hole just past the tables edge.  The tool is finished and ready to make head pins or rivets heads.
Video of making head pins coming soon.

Jim

Tuesday, May 3, 2011

Sterling Silver and Blue Swarovski Crystals

Robin's latest earrings.
Handmade sterling silver hoop earrings with sterling silver chain, blue swarovski crystals, and sterling silver bead dangles. These earrings are a perfect for everyday, or a night on the town. They are light weight and comfortable to wear while still giving you great movement. The earwires are handmade by me out of sterling silver wire. The earrings hang at a total lenght of about 1 3/8" and are about 1/2" wide at the widest point.

Sunday, May 1, 2011

Sketches for Lapidary Journal's April Design Challenge: Eclipse

I used the solar eclipse and the passage of time as inspirations for the sketches I entered in their contest.  It was fun to try and come up with designs in a theme. 
Bracklet with the eclipse at various stages of cycle on each link.

Eclipse at it's most vivid moment hiding the sun with only the ring around the outside glowing.

Showing the passege of time.
 Jim