 |
| J110515, Copper, Sterling Silver |
 |
| J110510, Copper, Fine Silver, Sterling Silver |
 |
| J110512, Copper, Sterling Siver, Fine Silver, Garnet |
 |
| J110513, Copper, Brass, Sterling Silver |
 |
| J110514, Sterling Silver, Copper |
|
| J110515, Copper, Sterling Silver |
|
| J110510, Copper, Fine Silver, Sterling Silver |
|
| J110512, Copper, Sterling Siver, Fine Silver, Garnet |
|
| J110513, Copper, Brass, Sterling Silver |
|
| J110514, Sterling Silver, Copper |
 |
| Use a harded steel washer and drill a hole just bigger in diameter than the wire you plan on using for the head pin or rivet. Use some cutting fluid or WD40 while drilling the steel to keep the drill cool and lubricated and be patient, as the steel is much harder than precious or base metals used in jewelry. You can find washers at your local hardware store or online through places like McMaster-Carr. |
 |
| Drill a larger hole (1/8") for 22ga wire in a short piece of wood near one end. |
 |
| I used 5 minute epoxy to hold the washer to the piece of wood. |
 |
| Mix epoxy 1:1 according to instructions and put over the hole where the washer will go. |
 |
| Place the washer over the hole lining up the small hole drilled through the washer and the clearance hole in the wood. |
 |
| Clamp the washer in place and allow full cure time to dry, typically 24 hours. I put a piece of scrap paper between the washer and clamp to keep the epoxy off the clamp. |
 |
| Remove the clamp and paper. Sand the top of the rivet to remove excess epoxy and create flat surface. Using the same drill sizes used in the washer and clearance holes, chase out the epoxy by redrilling. |
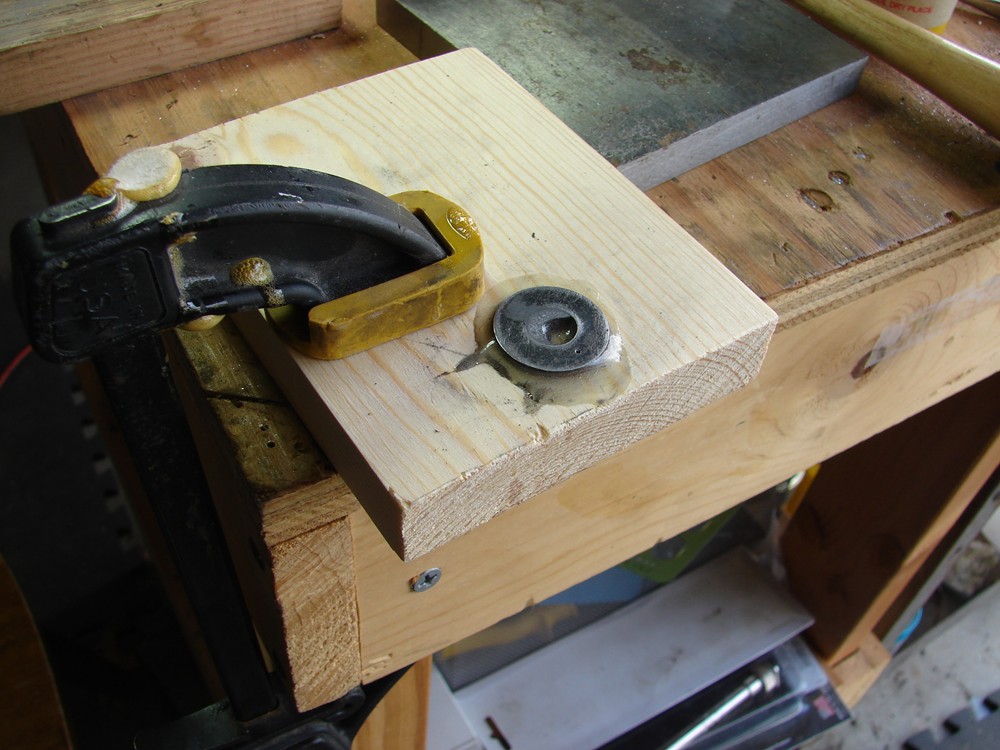 |
| Clamp the block to a table with the rivet hole just past the tables edge. The tool is finished and ready to make head pins or rivets heads. |
The final steps to complete aluminum and resin autism awareness pendant.  |
| I use the inside of plastic jar lid with some tape as a mount for piece before filling with resin. |
 |
| Pendant taped down ready for resin. |
 |
| Mix resin according to instructions. Rubber gloves are helpful to keep hands clean. |
 |
| Use tooth pick to transfer resin into cutout opening in pendant to cover the paper completely. Pick any large bubbles with pick. |
 |
| I created a vacuum chamber from recycled plastic jar with hole cut in bottom. Using a shop vac you can create a vacuum to pull the air out of resin. Take care to not apply too much vacuum or resin goes everwhere. |
 |
| Inspect resin and if all is well, set in protected ventalated space to cure. The fumes can be pretty bad, so use proper personel protection when working with resin. |
 |
| After resin has fully cured cut the back flush with the front. Sand edges smooth. |
 |
| Clean pendant to remove metal shavings from sawing and filing. |
 |
| Sand the back of the piece to designed finish. |
 |
| Sand the front to desired finish. |
 |
| I used buffing wheel and Zapp compound to polish front of piece. |
 |
| The pendant after polish, still needs cleaned around rivets. |
 |
| The pendant after cleaning. |
 |
| I applied Renaissance micro-crystalline wax. |
 |
| Add cord and the pendant is complete. |
 |
| Lay back on front with hole lined up and check fitup. |
 |
| Check fit by putting paper drawing between sheet and center in center cutout shape. |
 |
| Add jump ring to hang pendant from. |
 |
| I fluxed and soldered jumpring to a closed loop. The cutout in the back allows the front to have jumpring soldered before the back is added. The paper would be damaged by the heat. |
 |
| With paper centered in front cutout, mark the common hole used on the back as well with sharpie. |
 |
| The back, paper with dot, and front. |
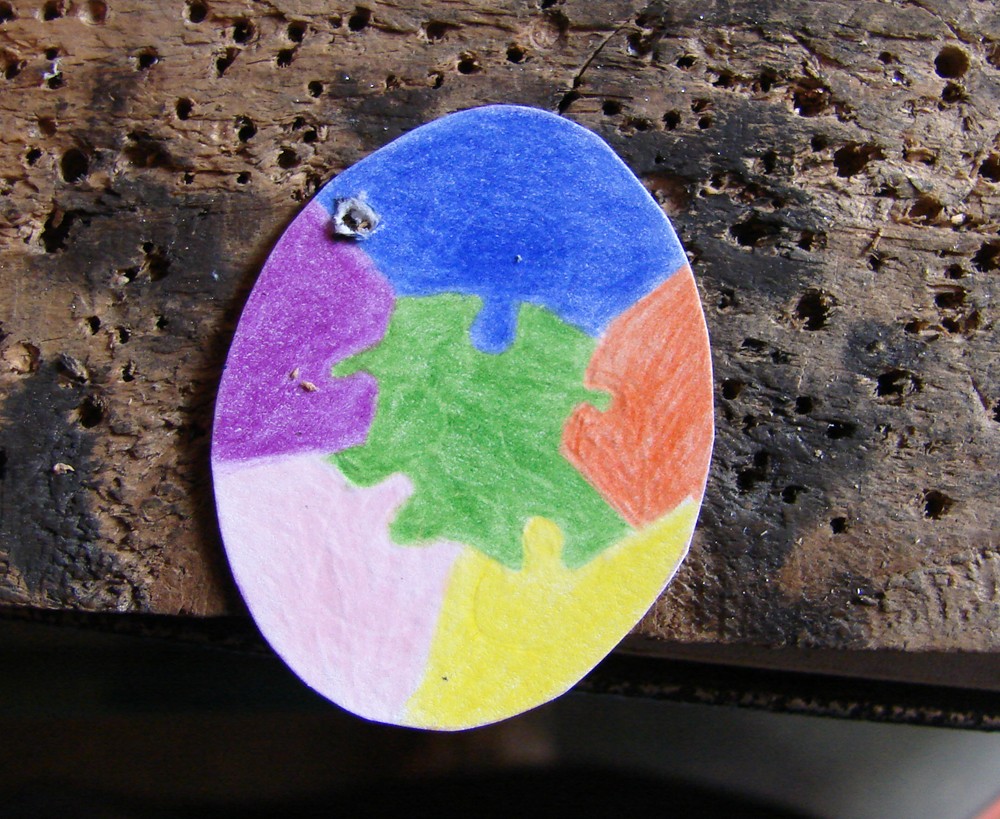 |
| Drill hole at dot location. |
 |
| Using tubing in common hole line up back, paper, and front. |
 |
| Use a drop of super glue to hold paper in position on back after alignment found. |
 |
| To find the length of rivet, put rivet material through the common hole in stack of back, paper, and front, plus aditional piece of the thicker material used as the front. Mark rivet material at total height with scribe or sharpie. |
 |
| Cut rivets for all open holes in the front the same length. Sand ends of rivets flat and perpendicular to axis of rivet. |
 |
| Cut paper from notch on back. |
 |
| Rivet the back, paper, and front using common hole. Flip part during riveting to keep it even and centered in material. |
 |
| With pieces lined up, drill one rivet hole on side opposite the first rivet. Deburr hole. Clean any debris from openings. |
 |
| Rivet the new hole to secure the pendant together, the pieces will now stay true to each other. |
 |
| Match drill out remaining holes using the front as a guide. Deburr holes and clean out all shavings. |
 |
| Rivet remaining holes. |
 |
| Flip part during riveting to keep rivets centered. |
 |
| Lay the front over the back and mark the top hole and one other with a sharpie. |
 |
| Center punch and drill out one of the holes other than the top in the back |
 |
| Use a template or free hand a cutout around the top hole to clear the rivet set in the front. Make sure the size is not too big or it will not be covered by the front piece. |
 |
| Cut the clearance notch in the back |
 |
| Line up the back to the front and check fitup and clearance around notch. Adjust notch if needed. |
 |
| Lay front on heavy drawing paper and trace inside and outside with colored pencil in colors chosen for design. |
 |
| Paper with pattern traced with 6 colors. Be as creative with colors, patterns as desired. |
 |
| The paper pattern is then filled in and colors saturated. |
 |
| Lay the front over the drawing to check fit |
 |
| Deburr the drilled holes in the front using a larger drill, twisting by hand. This can be done right after holes are drilled to be a little more efficient. |
 |
| Lightly sand each piece, additional finishing will happen later, but easiery to access surfaces now. |
 |
| Cut one tube rivet about twice as thick as material. Sand ends flat and smooth. This will go in top hole and will be used to hang pendent from. |
 |
| Using cone punch flare rivet. Take light taps and flip over and repeat, over and over to keep rivet centered in material. |
 |
| Rivet flared nicely on both sides, ready for ball peen hammer to finish rivet. |
 |
| Finishing rivet with ball peen hammer, flip and repeat to keep rivet even. To be continued...... |


